

A polycarbonate panel replacement on a domestic enclosure typically costs several hundred pounds by the time you factor in parts, access equipment, and a specialist installer’s time. A 250ml bottle of silicone lubricant for the track runners costs around three pounds. That gap sums up the entire logic of preventive maintenance: small, regular effort versus large, reactive spend.
The same principle applies across every component of your pool enclosure. The structures that reach thirty years and beyond are not the ones built from better materials. They are the ones that were cleaned, lubricated, and inspected consistently. The ones that fail early were usually fine at installation.
Why a Maintenance Routine Pays for Itself
A well-maintained aluminium enclosure can comfortably exceed a thirty-year lifespan. That figure is not marketing copy, it reflects what happens when powder coating stays intact, seals are replaced before they fail, and track runners are kept free of grit. Neglect the same structure and you are looking at significant deterioration within ten to fifteen years, sometimes sooner if pool water chemistry is left unchecked.
The cost contrast between preventive and reactive maintenance is stark. A single replacement polycarbonate panel, professionally fitted, runs to several hundred pounds. A full re-seal of the frame costs more. A structural repair to a corroded aluminium section more again. Set against that, the products you need for a proper maintenance routine, a microfibre cloth, a bottle of diluted white vinegar, silicone spray, and the occasional EPDM seal, amount to a small annual outlay.
One factor that most owners underestimate is the effect of pool water chemistry on the enclosure itself. Chemical imbalances, particularly high chlorine levels or low pH, accelerate aluminium frame corrosion and cloud polycarbonate panels significantly faster than UV exposure alone. Your water chemistry is not just a swimming concern; it is a structural one. There is more detail on this in the pool water chemistry section further into this guide.
Consistent maintenance also does two things that matter beyond the enclosure itself. First, it keeps your structural warranty valid. Most manufacturers, including Arch Enclosures, build maintenance obligations into warranty terms. An undocumented, irregular maintenance history gives grounds to reject a claim. Second, it protects the resale value of your property. A well-presented, structurally sound enclosure is a genuine selling point. One with clouded panels, corroded fixings, and stiff runners is a negotiating liability.
This guide covers every part of the structure in turn. You will find specific guidance on cleaning polycarbonate panels without stripping their UV coating, caring for the aluminium frame and its powder-coat finish, lubricating sliding and telescopic mechanisms, inspecting and replacing EPDM seals and glazing gaskets, understanding how pool water chemistry interacts with the enclosure materials, and building a seasonal maintenance calendar that is realistic enough to actually follow. There is also a section on when DIY care ends and a professional service call begins. Start with understanding what your enclosure is made of, because the right maintenance approach depends entirely on the material you are working with.
Understanding What Your Enclosure Is Actually Made Of
Before you buy a single cleaning product or apply anything to any surface, it is worth spending five minutes understanding exactly what each part of your enclosure is made from. Using the wrong cleaner on the wrong material does not just reduce effectiveness, it causes permanent damage that no amount of subsequent care can reverse.
The aluminium frame and its powder coating
Arch Enclosures builds its structures from powder-coated aluminium extrusions. The aluminium itself is highly corrosion-resistant, but it is the powder-coat finish that handles day-to-day weathering: UV radiation, rain, airborne salts, and the humid environment directly above a pool. That coating is tough, but it is not indestructible. Abrasive cleaning products, wire brushes, and rough scrubbing pads cut through the surface layer, exposing bare aluminium to the elements. Once the coating is breached, oxidation sets in at the exposed point and can spread beneath the surrounding finish.
Impact damage tells the same story. A frame section struck hard enough to chip the powder coat, whether by a tool during a DIY job or a piece of garden furniture, needs the exposed area treated promptly with a compatible touch-up paint to prevent localised corrosion from taking hold.
Polycarbonate panels
Most domestic Arch Enclosures systems use polycarbonate glazing rather than glass. Polycarbonate is around 200 times stronger than glass at equivalent thickness, which is why it handles the physical stress of a telescopic structure moving on its tracks without risk of shattering. The practical trade-off is that polycarbonate scratches more readily than glass. It also relies on a UV-stable coating applied to the outer surface during manufacture; without that layer, the panels would yellow and become brittle within a few years of UV exposure. Anything that strips or scores that coating shortens the panel’s functional life considerably. This is the specific reason that solvent-based sprays, abrasive cloths, and high-pressure washing at close range are all off the list for polycarbonate care. You can find more detail on safe cleaning products for each surface in our dedicated guide.
EPDM rubber seals
The seals between panels and frame sections, and around door and vent openings, are typically EPDM rubber. EPDM handles UV exposure and ozone well, which makes it a sensible choice for an outdoor structure that spends its life in direct sunlight. The limitation is age. Even well-maintained EPDM hardens and begins to shrink after five to eight years, at which point it stops forming a reliable seal. A hardened seal allows water ingress at the frame junction, which is exactly the environment where aluminium corrosion and biological growth both accelerate. Checking seal condition annually is not optional maintenance; it is the difference between a two-pound replacement strip and a corroded frame section.
Mechanical systems: track runners and bearings
Sliding and telescopic sections run on either nylon-wheeled runners or stainless-steel-bearing assemblies, and the maintenance approach differs between them. Nylon wheels are quieter and lighter, but they respond poorly to silicone-based lubricants in some formulations and can be damaged by petroleum-based products entirely. Stainless-steel bearings tolerate a broader range of lubricants but are not fully immune to corrosion if the wrong product introduces moisture-retaining residue into the bearing race.
Knowing which type your enclosure uses before you apply anything is straightforward: check the installation documentation or contact Arch Enclosures directly with your system reference. Applying the wrong lubricant to a nylon runner does not just fail to help, it can cause the wheel to soften and deform, leading to a track that binds rather than rolls. The right information takes minutes to confirm and saves a potentially expensive runner replacement.
Cleaning Polycarbonate Panels Without Causing Damage
Polycarbonate panels do most of the visual work in your enclosure. They are the surface guests and family see first, the component most affected by weather, and also the one most frequently damaged by well-intentioned but misguided cleaning. Getting the process right is straightforward once you understand why each step matters.
How often and how long
Plan to clean panels every two to three months as a standard routine. In practice, you will also clean whenever you can see visible dirt, algae beginning to establish, or the white mineral deposits that form where hard water dries on a surface. A typical session takes thirty to sixty minutes for a domestic-sized enclosure. Regular cleaning every few months keeps biological growth from getting established, which matters because algae and mould are significantly harder to shift once they have colonised a surface.
What not to use
This is the section that prevents most of the damage owners inadvertently cause. Never use:
- Abrasive scouring pads, green kitchen scourers, or steel wool. These create micro-scratches that individually are invisible but collectively cause panels to appear progressively more opaque over time.
- Solvent-based sprays, including acetone, white spirit, or any multi-surface cleaner with a solvent carrier. These strip or soften the UV-stable coating, accelerating yellowing.
- Bleach-based cleaning products. Bleach does kill mould, but it degrades polycarbonate and is corrosive to the aluminium frame and EPDM seals it will inevitably contact when you rinse.
- Dry wiping. Dragging a cloth across a dry panel drags any grit or debris across the surface, creating fine scratches. Always wet the surface before contact.
Light soiling: the basic method
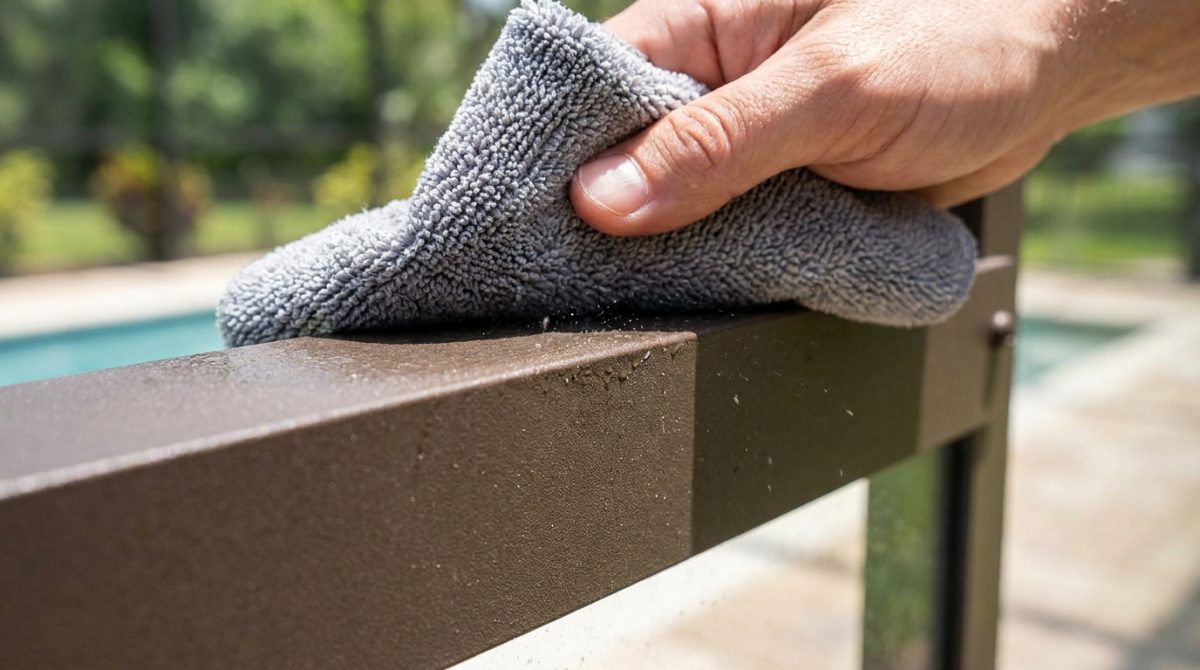
For regular maintenance cleaning where the panels are dusty or lightly marked, a soft microfibre cloth and warm water with a few drops of standard washing-up liquid is all you need. Wet the panel surface first, apply the cloth with gentle circular pressure, and rinse with clean water. The washing-up liquid breaks the surface tension that holds dust and light organic material to the panel, and the microfibre lifts it without scoring the coating.
Rinse thoroughly. Detergent residue left to dry on a polycarbonate surface creates a slightly sticky film that attracts airborne dust faster than a clean panel would, meaning you are actually creating more work for the next session if you skip a proper rinse.
Heavier build-up: low-pressure washing
For more stubborn soiling, a pressure washer can be used, but with two firm conditions. Set the pressure below 40 bar, and hold the nozzle at least 30 centimetres from the panel surface. Above 40 bar at close range, the water jet can penetrate the panel edge and cause delamination of multi-wall polycarbonate sheets. It can also force water past seals and into the frame section. Keep the nozzle moving steadily rather than holding it in one spot.
Algae and mould spots
For green or black biological growth, a diluted white vinegar solution works well and is safe for both polycarbonate and the surrounding frame materials. Mix one part white vinegar to ten parts water, apply with a soft cloth, and allow it to sit for two to three minutes before wiping. Vinegar’s mild acidity breaks down the biological material without attacking the UV coating or the EPDM seals nearby. Rinse completely afterwards.
This is the point where bleach is most tempting, because bleach does kill mould quickly. Resist it. The short-term result is not worth the cumulative damage to the panel surface and surrounding components over multiple cleaning cycles.
Temperature and timing
Do not clean panels on hot, sunny days or when the surface is warm to the touch. Cleaning on cooler days prevents a specific failure: cold water hitting a polycarbonate surface that has expanded in the heat creates thermal shock, and the result can be hairline stress cracks that are nearly invisible until they propagate. Early morning on an overcast day is genuinely the best time to clean.
Direction of cleaning
Always work from the top rail downward. This sounds obvious, but it is regularly ignored. If you start at the bottom and work upward, the dirty rinse water from unwashed upper sections runs back down over sections you have already cleaned. Starting at the top and working in horizontal bands means gravity is working with you, not against you.
Finish each section with a clean rinse from top to bottom before moving to the next. A second-pass rinse with plain water after the full panel is done is worth the two minutes it takes, particularly if the area has hard water, where dried mineral deposits are the most persistent problem you will face.
Caring for the Aluminium Frame and Powder Coating
The powder coat finish on your enclosure frame does more than look good. It is the primary barrier between the raw aluminium and everything the British climate can throw at it, from salt-laden coastal air to the chlorine-rich atmosphere directly above a busy pool. Once that barrier is compromised, oxidation moves quickly and quietly beneath the surface before the visible damage makes itself obvious.
Inspect the powder coating twice a year, once in spring and once in autumn, paying close attention to corners, cut edges around fixings, and any spot where two frame sections meet. Even a chip the size of a fingernail is enough for moisture to creep under the coating. Press gently around any bubble you find: if the paint lifts away like a blister, oxidation is already spreading underneath.
For routine cleaning, wash frame sections with a pH-neutral car shampoo and a soft-bristle brush. Work methodically from top to bottom so dirty water does not run over sections you have already cleaned. Avoid directing a pressure washer at joints, because the force pushes water inside hollow extrusions where it sits and cannot easily dry out, accelerating corrosion from the inside.
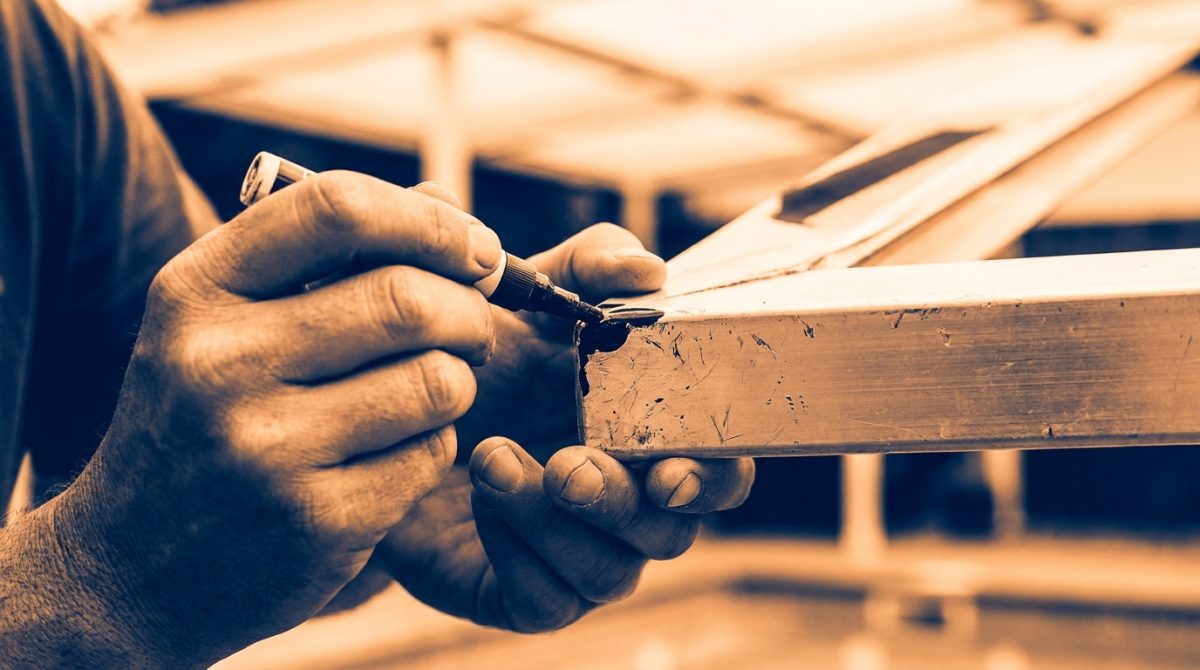
When you find bare metal, act the same day. A matching powder-coat touch-up pen is the neatest solution for small chips; for anything larger, a cold-galvanising zinc-rich primer provides a solid protective layer until a proper refinish can be arranged. The key is sealing the aluminium before oxidation has any time to establish itself.
If your enclosure is within roughly five miles of the coast, or the pool is used heavily and the water chemistry runs high in free chlorine, add a monthly fresh-water rinse of all frame surfaces to your routine. Salt and pool chemicals are the two fastest accelerators of aluminium corrosion, and they accumulate on horizontal ledges and around drainage channels where you might not think to look.
At least once a year, check all frame-to-frame bolted connections and re-torque them. Thermal cycling, where the frame expands and contracts with temperature changes, combined with the low-frequency vibration from wind loading, works fixings loose over time. For M8 stainless steel fixings, which are the most common in quality enclosure systems, the manufacturer specification is typically in the range of 8 to 12 Nm. A basic torque screwdriver handles this in under an hour.
One rule with no exceptions: never use a steel wire brush to remove surface staining or corrosion from aluminium. Steel particles break off and embed in the softer aluminium surface. Once there, they corrode themselves and set up galvanic corrosion that damages the surrounding material far more aggressively than the original stain ever would have. Use a nylon brush or a dedicated aluminium cleaning pad instead.
Lubricating and Servicing the Moving Parts
Sliding and telescopic sections are the components that take the most punishment in a retractable enclosure. Every time the structure is opened or closed, the wheels, tracks, and guide rails take on load, shed grit, and wear incrementally. They are also the parts owners notice first when something goes wrong, because a section that sticks or grinds is immediately obvious. Most of those complaints trace back to a lubrication schedule that was never set up.
Before you apply any lubricant, brush out the track channels thoroughly. Leaves, grit, and insect nests accumulate in the channels over weeks and, once mixed with lubricant, turn into an abrasive paste that accelerates wear rather than reducing it. A stiff nylon brush or a vacuum crevice tool works well. Do this step every time, without skipping it.
Apply a dry silicone spray to all track runners, wheels, and guide rails every three to four months. Dry silicone is the correct product for this job for two reasons: it does not attract dirt the way oil-based lubricants do, and it is safe for both the nylon wheels and the aluminium track surfaces. Spray a short burst along the track length, then run the section back and forth twice to distribute it evenly. Wipe away any excess with a clean cloth so it does not drip onto the pool surround.
A common mistake is reaching for a can of WD-40. It works as a moisture displacer in the short term, but it is not a lubricant in any durable sense. Within a few weeks it leaves a sticky, gummy residue that traps grit and makes the track dirtier and more resistant than it was before. Keep it away from the moving parts of your enclosure entirely.
Each time you lubricate, check the condition of the nylon wheels before you put the cap back on the can. Worn wheels show as flat spots where the contact surface has ground down, or as cracking across the tread. A replacement wheel costs under £20 in most cases and takes minutes to swap out. Delaying wheel replacement risks gouging the aluminium track, which is a structural repair rather than a consumable swap and can cost ten to twenty times as much to put right.
Pay attention to the locking handles and push-button latches as well. Stiffness in a latch mechanism is a warning sign, not a minor inconvenience. When a handle is stiff, users force it, and the casing cracks under the leverage. A small amount of silicone grease worked into the latch mechanism with a cotton bud is usually enough to restore smooth operation. Check every latch point on the enclosure while you are doing the track lubrication, so nothing gets missed.
For enclosures with electric motor drives, the motor housing itself needs attention once a year. Clear any debris from around the motor unit and check that nothing has nested inside the housing over the summer. More importantly, check that the limit switches at both ends of travel are still correctly set. A limit switch that has drifted out of position can allow the motor to over-travel, putting strain on the end stops and on the frame connections at the terminal positions. If the enclosure does not stop cleanly at fully open or fully closed, adjust the limit switches before using the motor drive again.
A full lubrication and inspection session for the moving parts of a standard two or three-section enclosure takes less than 45 minutes once you have the routine down. Doing it four times a year costs almost nothing. Missing it for two or three years is where the expensive repairs come from.
Inspecting and Replacing Seals and Glazing Gaskets
The rubber seals running along every panel edge and frame joint in your enclosure do two jobs at once, and both of them matter. They create the weather-tight barrier that keeps rain, wind, and cold air out, and they act as a cushion that absorbs the small movements of the panels as the frame flexes under wind load or thermal expansion. Without that cushion, panels vibrate against the aluminium and eventually crack from the inside edge outward.
The material used in quality enclosure systems is EPDM rubber, which handles UV exposure and temperature cycling far better than standard synthetic rubbers. Even so, it has a finite service life. Exposure to pool chemicals accelerating off the water surface, combined with years of weathering, causes EPDM to harden, lose elasticity, and eventually crack or pull away from the frame channel it sits in.
Carry out a seal inspection once a year. Spring is the most practical time because it gives you the whole warm season ahead to act on anything you find. Run a finger slowly along every seal line on the structure. You are feeling for sections that have gone hard and brittle, visible cracks running along the seal surface, gaps where the seal has pulled away from the corner joints, or areas where it has compressed flat and lost its cross-sectional shape. Any of these are signs that the seal is no longer doing its job reliably.
A practical water test confirms your findings. Run a garden hose steadily along the outside of a seal joint while a second person watches from inside for any drips or moisture appearing on the frame. Work around the entire enclosure systematically. Any ingress point you find is worth addressing before winter, because once water is getting through to the frame channels and fixings in cold weather, the freeze-thaw cycle does rapid damage to both the seal groove and the surrounding structure.
For minor surface cracks that have not yet caused the seal to lose its compression, a temporary repair with a silicone sealant rated for outdoor UV exposure can buy a season. The critical word is temporary. A seal that is cracking on the surface is hardening throughout its body, and a bead of silicone over the top does not restore the elasticity that makes EPDM effective. Plan the full replacement for the next maintenance window.
Replacement EPDM glazing gasket is sold by the metre from enclosure suppliers and specialist rubber seal stockists. For straight runs, a competent owner can cut the new gasket to length, clean out the old material from the channel, and press the new seal in using a blunt wooden tool to avoid tearing it. Corner joints are a different matter: the mitred corners need to be sealed correctly to avoid a gap forming under the panel edge, and it is worth having a professional fit those sections if you are not confident in the technique. For more product-specific guidance on frame care and panel maintenance, detailed walk-throughs are available for Arch Enclosures systems specifically.
One substitution to avoid entirely: standard bathroom silicone is not a replacement for a structural glazing gasket. Bathroom silicone lacks the elongation percentage and UV stability that EPDM provides. In a location exposed to direct sun and pool chemistry, it will go chalky and begin pulling away from the substrate within one to two seasons. The enclosure looks sealed, but moisture is getting through at every point where the silicone has debonded from the aluminium.
The downstream consequences of neglected seals are worth spelling out plainly. When seals fail, humid air from inside the enclosure condenses on the cooler panel surfaces and cannot escape. That condensation runs down into the base frame channels and sits against both the aluminium and any gasket material remaining there. Over months, it stains polycarbonate panels with hard water mineral deposits that are difficult to remove without risk of scratching, and it creates the damp, still-air conditions that allow mould to establish itself on the frame. Replacing a seal costs a few pounds per metre and an afternoon. Stripping out mould and refinishing stained panels is a much larger job.
How Pool Water Chemistry Affects the Enclosure Structure
Splash is unavoidable. Every time someone swims, climbs out, or uses a pool jet, water lands on the lower frame sections, the track channels, and the base of the polycarbonate panels. That means whatever is dissolved in your pool water is also landing on your enclosure, and water chemistry becomes a direct maintenance factor for the structure itself, not only for the swimmers inside it.
Chlorine is the most obvious concern. Levels above 3 ppm that are left uncorrected for extended periods will strip powder coatings and begin to pit the underlying aluminium within months. The target range of 1 to 3 ppm protects both bathers and the structure, so treating those numbers as a structural matter as well as a water-quality matter is the right framing. A reading above 3 ppm is not just a skin irritant; it is an active attack on your frame.
High pH water, anything above 7.8, promotes calcium carbonate scale deposits. These build up at frame junctions and along the lower edges of polycarbonate panels. Scale feels harmless but it is physically abrasive, and more importantly it traps a film of moisture against the aluminium surface underneath it. That persistent damp environment accelerates corrosion far faster than direct splash alone.
Low pH water is the more aggressive chemical threat. Below 7.2, the water becomes acidic enough to attack the aluminium oxide layer that forms naturally on extruded aluminium sections. That oxide layer is the metal’s primary built-in protection. Once it is compromised, corrosion moves inward quickly, and the damage is not always visible until a section shows pitting or discolouration under the powder coat.
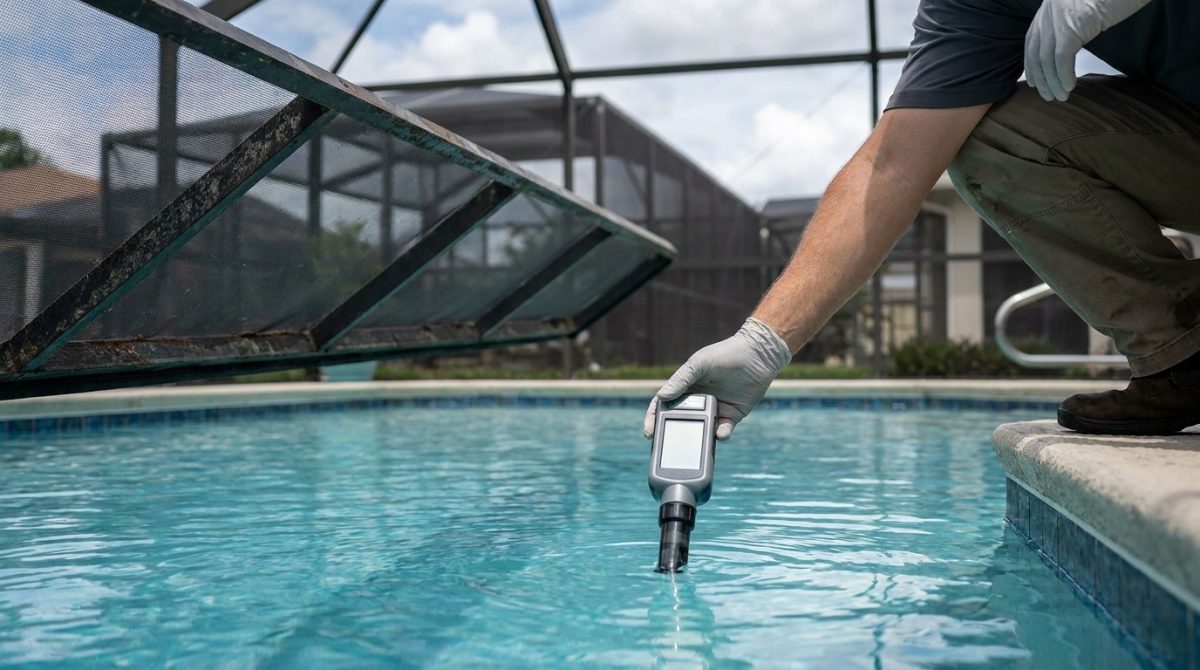
Test your pool water at least twice a week and balance pH, total alkalinity, and sanitiser levels before they drift outside the safe range. A digital photometer gives considerably more reliable readings than dip-test strips, particularly for pH, where strips can misread by 0.2 to 0.3 units in warm or bright conditions. That margin of error is enough to leave your water in the damaging zone without realising it.
After superchlorination or shock treatments, the chlorine spike is necessary but the enclosure needs extra attention. For the seven days following a shock dose, increase the frequency of fresh-water rinses on the lower frame sections. A quick rinse with a garden hose after each swimming session during that period removes the residue before it has time to react with the powder coating or the extrusion surface. It takes two minutes and it is one of the highest-return habits in this entire guide.
Building a Seasonal Maintenance Calendar That Actually Gets Done
The reason most maintenance routines collapse is that they exist only as good intentions. A seasonal calendar works when it is specific enough to act on without thinking, and short enough that it does not feel like a second job. The structure below treats the enclosure year as four distinct phases, each with its own realistic task list.
Spring: March to April
This is the most important check of the year. Winter is the hardest season on any outdoor structure, and the spring inspection is where you find out what it cost you. Start with a full structural walk-around: look at every visible fastener, check for any frame sections that have shifted, and press lightly on the lower extrusions to feel for unusual flex. Tighten all accessible fasteners with the correct torque, not just until they feel firm by hand.
Replace any seals or glazing gaskets that have hardened over winter. Cold temperatures make EPDM and rubber compounds brittle, and a seal that looks intact may have lost its compression entirely. Run a finger along each seal channel; it should feel pliable and spring back slightly when pressed. Anything that crumbles or stays compressed is overdue for replacement.
Wash all panels and the full frame from top to bottom, and re-lubricate every track, roller, and hinge point before the enclosure goes into regular summer use. Doing this now means the system runs smoothly through its busiest period rather than developing squeaks and stiff sections in July when you want to be swimming, not diagnosing problems.
Summer: May to August
The work drops considerably once the spring check is complete. A monthly panel rinse is the core summer task, and it matters more than people expect. Sunscreen is the primary contaminant during the swimming season. It bonds to polycarbonate under UV exposure, and the longer it stays on the surface the harder it becomes to remove without risking light abrasion. A rinse after every few heavy-use days prevents that build-up from becoming a cleaning challenge. You can read more about the products that work best in our guide to pool enclosure cleaning.
Run your monthly pool chemistry check with the enclosure impact in mind, not just swimmer comfort. If you find chlorine has crept above 3 ppm, act the same day and rinse the lower frame sections as a precaution. For motorised enclosure systems, check the drive units and motor housings during any sustained hot spell above 28 degrees Celsius. Motors that run continuously in direct heat can overheat; ensuring the ventilation slots on motor housings are clear of debris takes thirty seconds and prevents a callout.
Autumn: September to October
Track channels become a genuine problem in autumn. Leaves and organic debris that settle into aluminium track channels do not just block movement; they decompose and hold moisture against the channel walls through the winter months. Clear every track channel before leaf-fall is fully underway, not after. A stiff-bristled brush and a hand vacuum is all it takes.
Re-lubricate all moving parts before the enclosure moves into its reduced-use period. Lubricant applied in autumn protects through the winter; lubricant applied only in spring means several months of dry metal-on-metal contact in the tracks. Inspect every roof panel for micro-cracks before the first frost arrives. A hairline crack that is invisible in September becomes a water ingress point once ice forms inside it and expands the fracture. Catching it in October means a simple repair; missing it until February usually means a panel replacement.
Winter: November to February
The right approach in winter depends on how the enclosure is used. If it runs year-round, condensation management becomes the priority. Increase ventilation checks, because a warm interior against cold panels creates persistent condensation that drips onto frame junctions and sits in track channels. Even leaving roof vents cracked open slightly on milder days helps the moisture balance.
If the enclosure is partially closed down for the coldest months, do not lock all the sliding sections fully closed. Leave each track with a small gap, perhaps five to ten millimetres. If water enters the track channel and freezes, a fully closed section can jam solid and the force needed to open it in spring risks bending the track or cracking the panel edge. A tiny gap allows any ice to expand without doing damage.
The Annual Professional Inspection
Every twelve months, a qualified installer should carry out a structural check that goes beyond what an owner inspection can reasonably cover. They will check structural load capacity, re-torque the critical joints at the base fixings and roof apex, and look for early signs of frame fatigue that are not visible to an untrained eye. Hidden fatigue shows up in the way extrusion joints carry load, and identifying it early is the difference between a straightforward repair and a full section replacement.
Keeping a Log
Keep a simple written or digital log of every maintenance task, including the date it was completed and any observations you made. Note if a particular seal felt stiffer than last time, or if a track needed more force to shift than usual. This record serves two practical purposes: it supports any warranty claim, because manufacturers will ask for evidence of maintenance history, and it lets you spot patterns before they become failures. A track that needs re-lubricating every six weeks rather than every season is telling you something is wearing faster than it should.
Most owners who follow this structure find that front-loading effort into the spring and autumn checks reduces in-season time to under thirty minutes a month. That is roughly the same time it takes to clean a bathroom, and it protects a structure worth considerably more than one. The calendar is not about perfection; it is about doing the right thing at the right time of year, consistently, so that the enclosure earns back its cost in extended service life rather than in avoidable repairs.
